The lists of all stores in those you’re going to allow the store pickup and local delivery feature so customers can select the store from the lists on the full cart page from which store location they are going to pick their order.
For store pickup #
In the locations feature, you have to create the location (Store lists) in which you’re going to allow the store pickup so when the customer reached the full cart page, they can select one store from the lists for store pickup and its pickup date and time from the calendar.
For local delivery (coming soon…) #
You can use the same location for the local delivery too. Simply, you have to enable the local delivery option from the Local delivery tab inside the location edit page.
Creating a new location #
In order to use/enable the store pickup and local delivery feature for that location, you have to create a location first or use the pre-created location. To create a new location, please follow the below steps:
- Go to the locations page by clicking on the navigation button
- There you’ll see the lists of the locations you have already created or it’ll fetch the locations from your shopify settings from locations.
- Click on the “Add location” button to create a new location.
- Fill the erquierd information and enable store pickup or local delivery feature for that location by neviagting the tabs.
- Click on save button to create a new location.
- That’s it! 😀 You’re done with creating a new location. Woooohooooo………
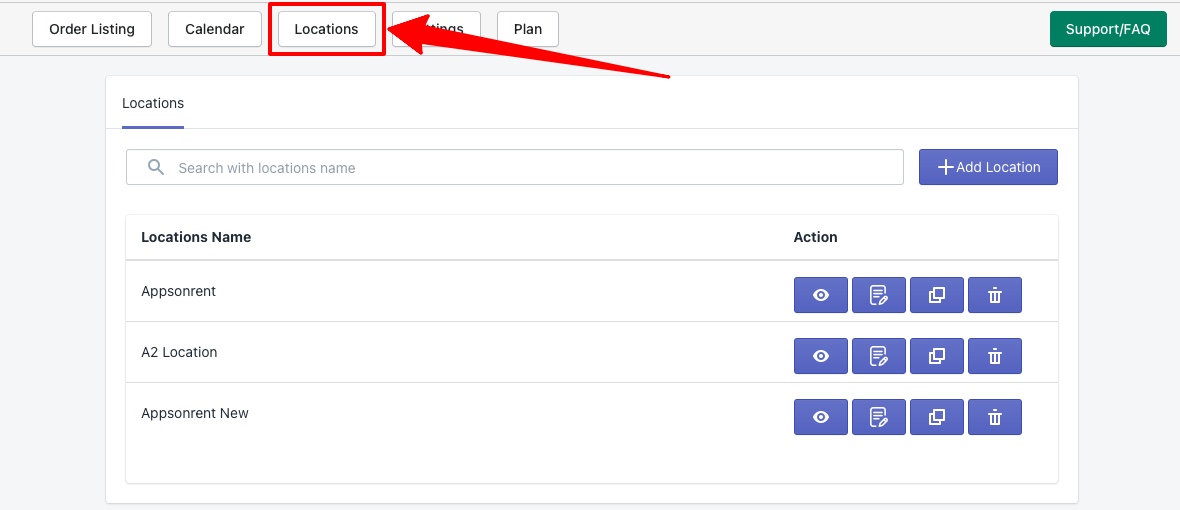
Actions you can perform on the locations page for the listed locations are as follows:
- Enable/Disable location
- Edit/update settings
- Duplicate the location
- Delete the location
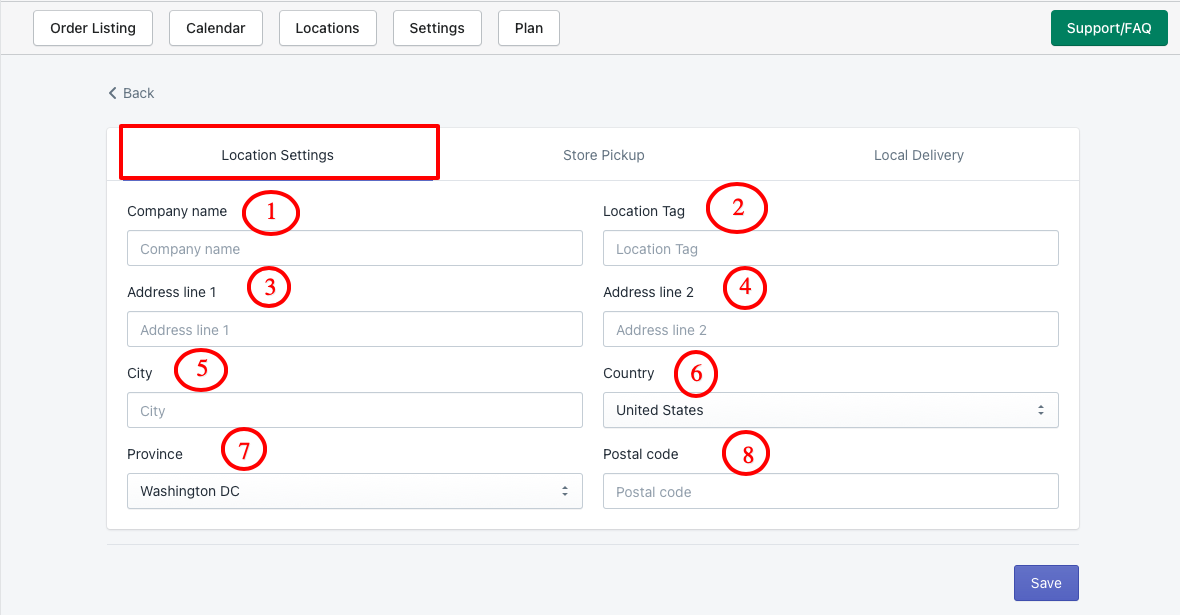
Let’s take a look at the below information you have to fill in while creating a location.
- Company Name
- Location tag
- Address line 1
- Address line 2
- City
- Country
- Province [Required in some countries]
- Postal code