Under these settings, you’ll get the below settings to change.
- Delivery Days and First Day Of Calendar
- Apply Cut-Off Time
- Time Picker Settings
- Before Padding Time
- Time Format
Let’s understand each option in details #
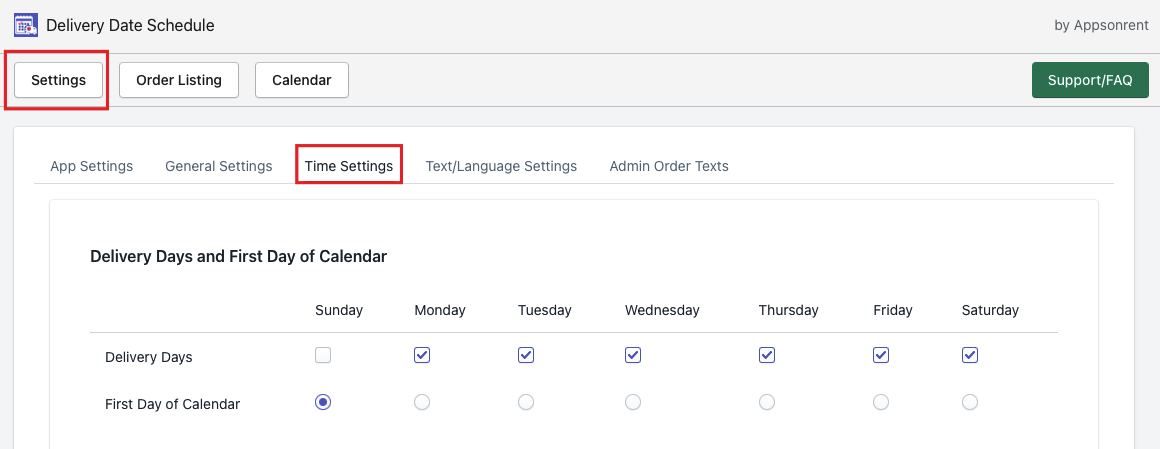
Delivery days and first day of calendar #
Select the weekdays in which you want to allow delivery and the first day of the calendar to be shown in the delivery calendar.
Apply cut-off time #
This option is for those who want Same-day & Next-day delivery with a cut-off time. Cut-off time means you have a working day from 10:00 AM to 5:00 PM and you want to get an order for same-day delivery till 4.00 PM.
By selecting this option will not allow getting order delivery after 4.00 PM and will hide the time slots for the day and the next date is enabled.
If cut-off time is not enabled then it will work as usual and time slots will be hidden according to the current time.
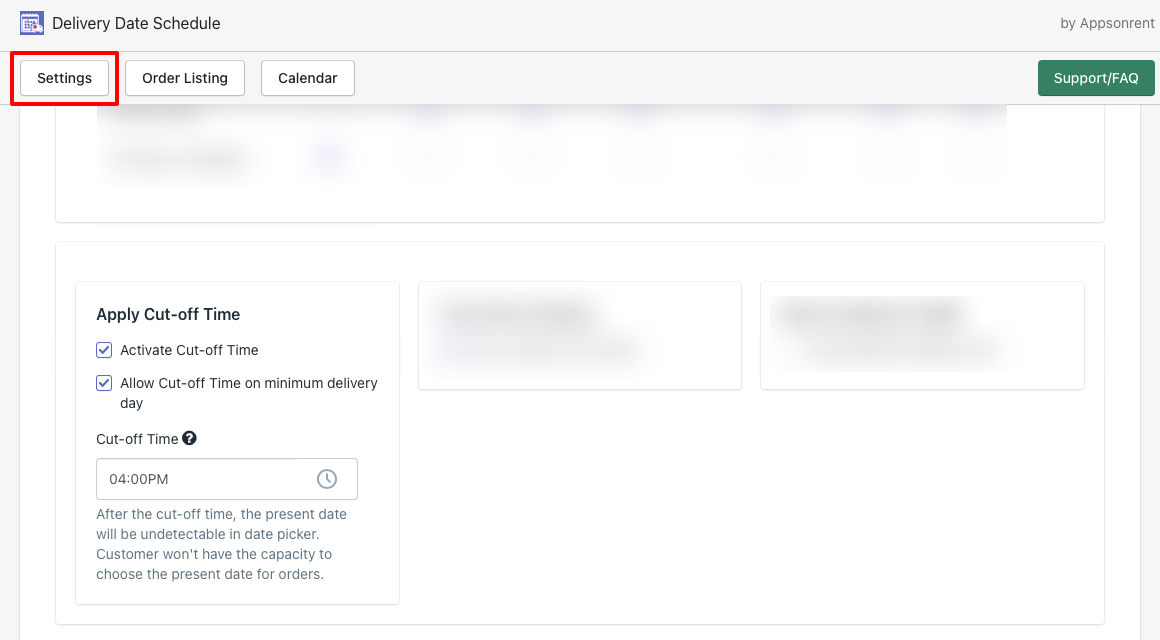
NOTE: Allow cut-off time on minimum delivery days option will work when it has value more than 0.
Time picker settings #
With this option, you can enable/disable the time picker in the delivery.
Before padding time #
This option allows skipping the number of hours you add in that field from the time slot according to the current system time.
Add hours in minutes in the field and save the settings, it’ll convert the minutes into hours and skip the time slots according to hours from the current time.
To read this more, please visit this link.
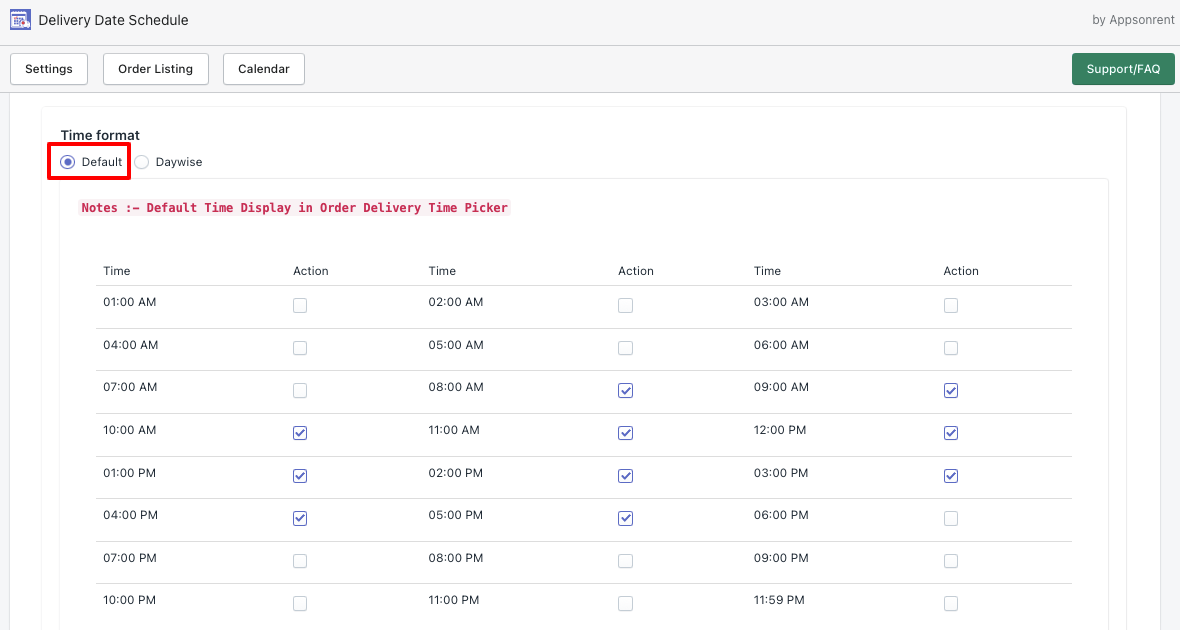
Time format #
Time format allows setting the delivery time slots for the order delivery. You can set time slots in two types.
01) Default and 02) Daywise.
Default #
Default time slots have the following time slots which you can’t edit and you can just only select or enable or disable them.
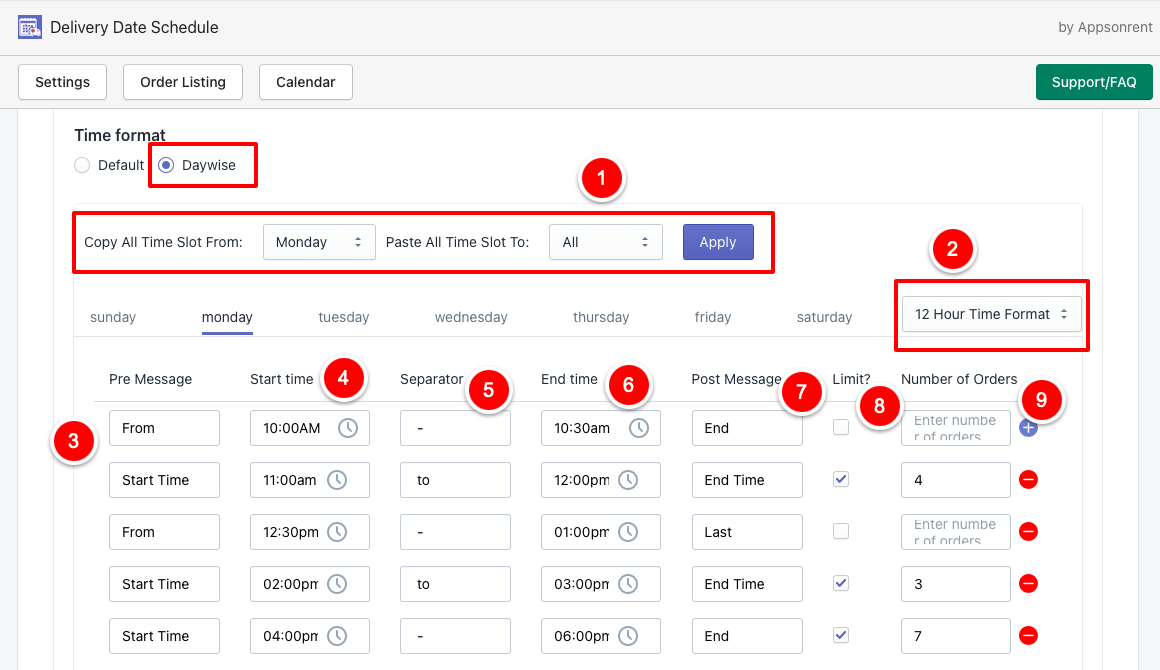
Daywise #
Daywise time format allows setting up your own time slots by selecting the time in hours and there will be a start time and end time which have any interval you want in between the start time and end time.
There are several options available in daywise time format so let’s get more details on them one by one.
01) Copy all time slots from: Add time slots for one day and copy them to all days by using this option.
02) Time formats in hours: Change the time formats in 12 and 24 hours.
03) Pre Message: Set message to show before time like “From 10:00 AM” so From is the pre message.
04) Start time: Start time will be the first time in the time slot. For example, 10:00 AM to 11:00 AM or 10:00 AM is the start time.
05) Separator: A separator is a different text or sign that can be used to differentiate the time slots. For example, 10:00 AM to 11:00 AM so “to” is the separator in that time. You can use ( – ) dash to add in time format like 10:00 AM – 11:00 AM.
06) End time: End time is the last time in the time slots. For example, if there is a time slot from 10:00 AM to 11:00 AM then 11:00 AM is the end time.
07) Post message: Post message is the same as Pre Message. In Pre message, the message comes before the time slots and in the post message, the text will become after the time slot. For example, 10:00 AM – 11:00 AM End so the “End” is the post message.
08) Limit: You can enable/disable the order limit for the particular time slots.
09) Number of orders: add the number of orders you want to limit for the time slot. You must have to enable the Limit option to work this.